
Have you ever found yourself in a situation where a hiring manager urgently needs a position filled, and the interviews were supposed to start 'yesterday'? It's a classic scenario!
If you're facing this challenge, this micro-tool, or your very own 'Recruiter AI Intern', will give you a jumpstart and save a considerable amount of time. Let's dive in to quickly build this in minutes!
Setup Breakdown
To get started, you'll need to create accounts with the following tools:
- Notion: Your front-end
- Make.com: A workflow automation tool
- OpenAI Account: Your AI engine
- Google Drive : For document and sheet storage
Once you've signed up for these tools, you're ready to set up your AI Intern. This tool will help you automate the following tasks:
- Generate a job description for your role
- Write LinkedIn captions for job posts, including one for the hiring manager
- Help you get skill-specific questions to screen and assess your applicants
- Notify you via email once the Job Kit is ready
Notion Front-end Setup
Head over to your notion account and follow these steps:
- Create a new page public page
- Add two databases, let's name the first one as 'Role Requisition ' and the second as 'Job Kit'
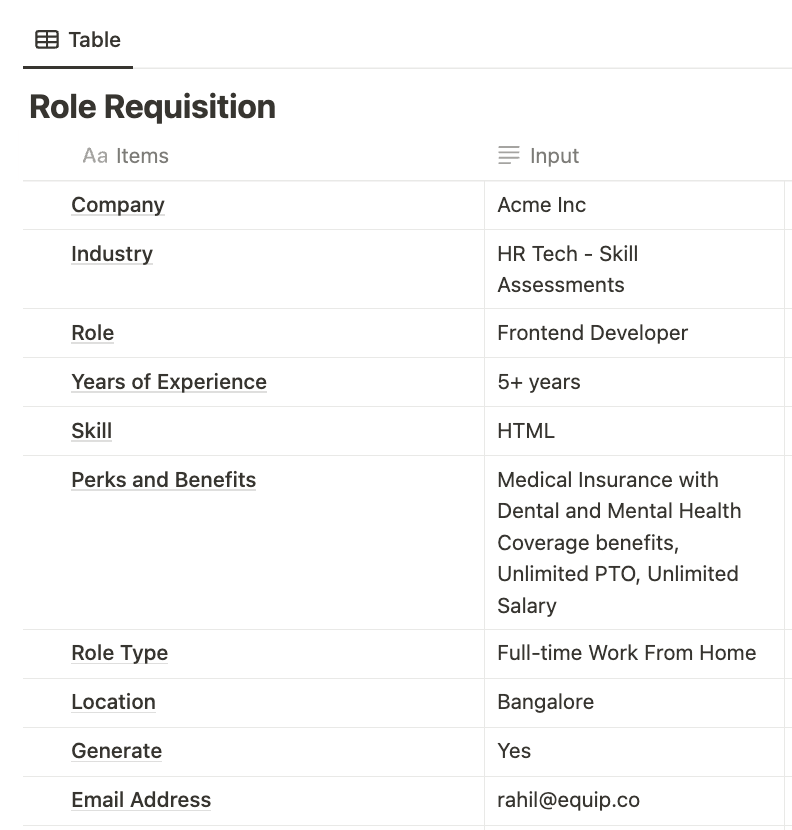
- In the 'Role Requisition' database, add these columns: Company Name, Industry, Role Name, Location, Role Type, Years of Experience, Skills Needed, Perks and Benefits, and Email
- In the 'Job Kit' database, add these columns: Job Description, Job Description Doc, LinkedIn Post Caption, LinkedIn Caption for Hiring Manager, and Assessment Questions.
- And fill-up the values as shown on the picture below.
Make Workflow Configuration:
Once you've gone past the signup and onboarding screens on your Make Account, click on Create Scenario button. And you'll be taken into a canvas.
Make.com will acts as the backend or workflow manager for the tasks we need it to accomplish.
Steps to Build Your Make Workflow:
Notion and Make Connection
- Click on the '+' icon on the new scenario screen and search for Notion.
- Select the Notion option and choose the 'Watch Database Items' method.
- Connect your Make and Notion accounts using the social sign-in option.
- Once successfully connected, select 'By Updated Time' in the 'Watch Database Items' field. Then, choose the appropriate Database ID from the dropdown options. Make sure to select the 'Role Requisition' database option. Save this module, then click on the '+' icon on the right.
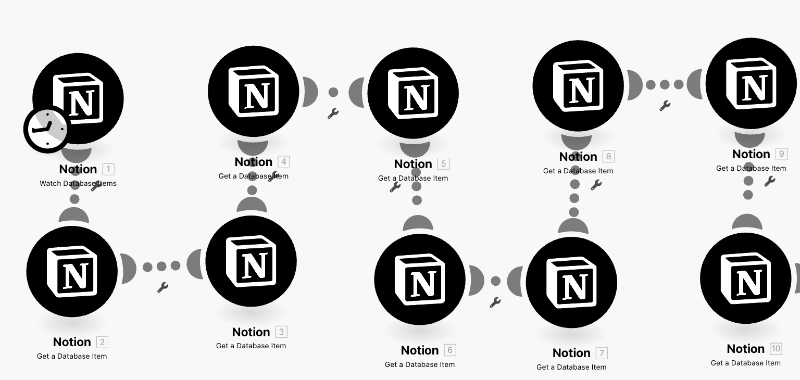
- Select the Notion Module again; this time, opt for 'Get Database Item'. Go to the 'Role Requisition' Database and select the 'Company Name' item, then save the module.
- Clone this module and repeat the process for all the items. Continue until you have added all items with their modules, ensuring they are connected to form a workflow.
- Finally, click on the 'Run' icon at the bottom of the workflow. To get the meta data from your notion sheet.
In case you're stuck, refer to this Video guide to replicate the steps.
ChatGPT and Make Connection:
Since you've created your OpenAI account at the begining, head over to the API section via this. And generate you API Keys from here. Copy and save the keys somewhere safe, and go to Make.com and add another module called OpenAI.
- Begin by navigating to the API section of your OpenAI account, which you created at the outset. From there, generate your API keys. Be sure to copy and securely save these keys.
- Proceed to Make.com and add a new module named 'OpenAI'.
- In Make.com, select the 'OpenAI' module and click on 'Create Connection'. Then, enter your OpenAI API Key and save the module. Once this connection is successfully established, you will see options to select a method and model.
- Within the OpenAI module, choose the 'Create a Chat Completion' method. Then, select the GPT-3.5k Turbo model, or whichever model is available under your subscription, and proceed to the 'Messages' section.
- Under 'Messages', set the role to 'Assistant'. Here, you need to add a skeleton prompt in the 'Message Content' field. For example: "Compose a clear and structured Job Description for a [JobTitle] role at [Company Name], in the [Industry]. The Job Description should include key responsibilities, tasks, required skill qualifications around [Skill], and the desired experience level is [Years of Experience]. This is a [Role Type] position, located at [Job Location] and comes with Perks and Benefits like [Perks and Benefits]"
- Incorporate values from your Notion database into this prompt, selecting them from the search items dropdown menu.
- Once the ChatGPT module is configured, its output will be used to generate the Job Description (JD), LinkedIn Captions, and skill-specific questions.
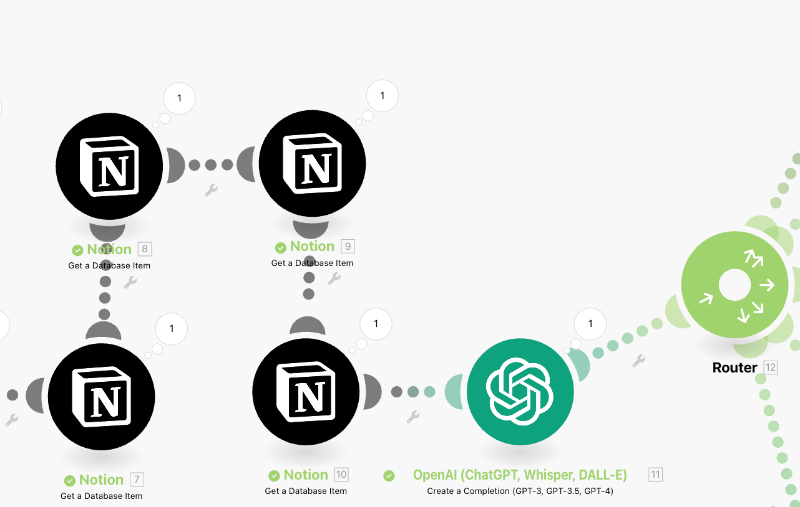
- To begin the workflow, add a 'Router Module' and connect it to your ChatGPT Module.
If you need inspiration for more such skeleton prompts, just choose from this prompt collection for Recruiting.
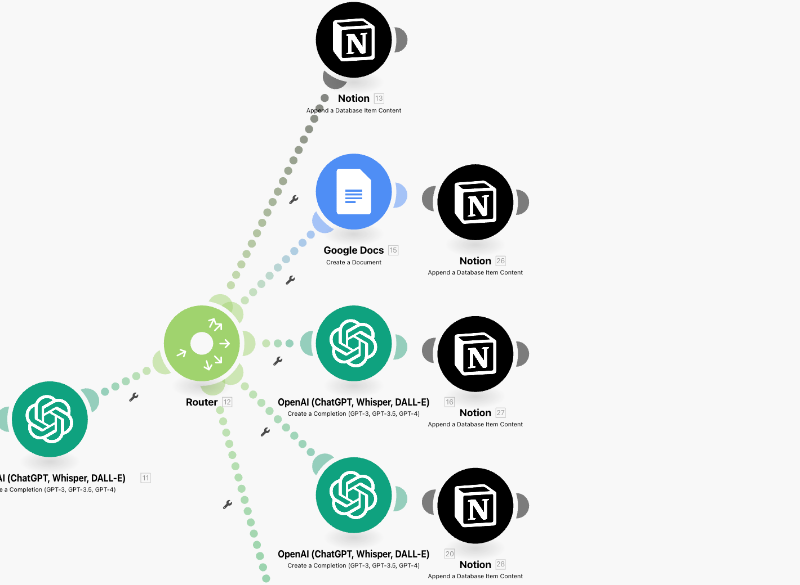
With the ChatGPT module set, we need to use its output to generate the JD, LinkedIn Captions and list down skill specific questions.
To begin, add the Router Module and connect it to your ChatGPT Module like:
Job Description Handling
- Utilise the Job Description output obtained from ChatGPT and connect it to the 'Notion - Append a Database Item' module. Then, select the 'Job Kit' database and choose the 'Job Description' option for the Database Item ID.
- Navigate to the Content Objects section. In the 'Type' field, select 'Paragraph'. You will then see the 'Text Content' field where you should select the output from the ChatGPT module, labelled as 'Message Content', and add it here. This action will directly populate the JD output from ChatGPT into Notion.
- Take another route from the Router Module and select the 'Google Docs' module. Complete the connection setup between Google and Make. Then, click on the 'Create a Document' action. Use the 'Role Name' value from the Notion 'Role Requisition' table and insert it into the 'Name' field.
- In the content field, select the output from ChatGPT and choose a Google Drive folder of your preference.
- Run the entire workflow and wait for the Google Docs Module to produce an output. Once this is completed, connect it to another 'Notion - Append a Database Item' module. Select the 'Job Description Doc' Database ID and save this module.

This process completes all the JD-related tasks. Your workflow is now capable of generating a Job Description and placing it in a Google Document for you to edit and later download as a PDF.
Need a video guide of this? Refer to this for the exact steps.
LinkedIn Caption Generation and Handling
- Return to the Router Module, select a new link, and add the OpenAI Module. This is necessary to generate both a LinkedIn Job Post Caption and a Caption for the Hiring Manager.
- Follow the steps similar to the previous ChatGPT Module setup: Choose the same method, model, and role. In the Message Content field, add a skeleton prompt like, "You're a Recruiter and you need to generate a LinkedIn Caption for this role: [Role Name]. Ensure the Caption is within 500 characters and includes all the details mentioned in this [Job Description]." For [Role Name], select the value from the Notion 'Role Name' and replace [Job Description] with the output from ChatGPT.
- After completing the above steps, save and run your workflow again. You will now see your second ChatGPT Module generating the LinkedIn Caption for the Job Post. From this module, add the 'Notion Append Database Item' module. Within this, select the Database ID for the 'Linked Post Caption' item. Under Content Objects, choose 'Paragraph' as the type and add the output from the second ChatGPT module into the Content field. Then, click Save.
- Go back to the router module, add another link, and select another OpenAI Module. Choose the same options as you did for the LinkedIn Caption. In the Message Content field, add another skeleton prompt: "You're the Hiring Manager for this role [Job Description]. Write an encouraging, positive, and succinct LinkedIn caption to invite applicants for a role in your team and ensure the captions is within 300 characters." Use the Job Description output from the first ChatGPT Module.
- Save the changes and run the workflow. Then, connect another 'Notion Append a Database Item Content' Module and repeat the same steps you performed for the LinkedIn Caption module.
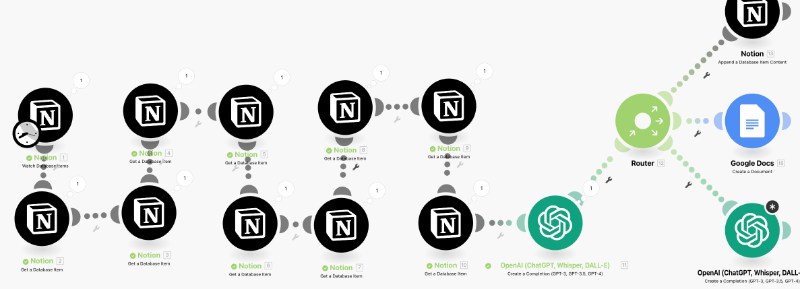
With the above steps replicated, now your workflow should start looking like this
Assessment Question Sourcing
With most of the JD-related tasks completed, we now need the bot to generate skill-specific assessment questions. To simplify this process, make a copy of this sheet and add it to your account. Then, proceed with the following steps in the Make workflow:
- Add another link from the Router module and select the 'Google Sheets Module'.
- Choose the Search Advanced Row's method.
- Navigate to and select the Google sheet you just copied, focusing on the 'Assessment Resources' tab under 'Sheet ID'.
- Enter the following formula into the Query field: "SELECT B WHERE A matches '[Skill Item]'". Now, select the skill output from the Notion 'Get Database Item' module. After doing so, hit 'Save' and choose another module.
- Select the 'Append Database Item' Module. This is to upload the skill assessment questions based on the required skill. Choose the 'Job Kit' Database and then the 'Assessment Question' item. In the content objects section, add the output from the Google Sheets module.
If you're stuck with any steps, check out this video for reference.
Setting Up the Email Notification:
Once the Job Kit is ready, we need the bot to notify us. For this, select another module following the Hiring Manager's LinkedIn Caption, and proceed with these steps:
- Add the Gmail Module and authenticate it with your Gmail account.
- Select the 'Send an Email' method. Copy the output from the Notion Email module and add it to the Email Address field.
- In the Subject field, select the Role Name Output and append "- JD Kit".
- In the Content field, add a message like this: "Hi, The JD Kit for the [Role Name] role is ready. <br> Check out the Job Kit Database to access the kit at [Notion Page Url]." Replace the placeholders with the role name and the public URL variable from Notion. Then, hit Save.
And your final workflow should look like this:
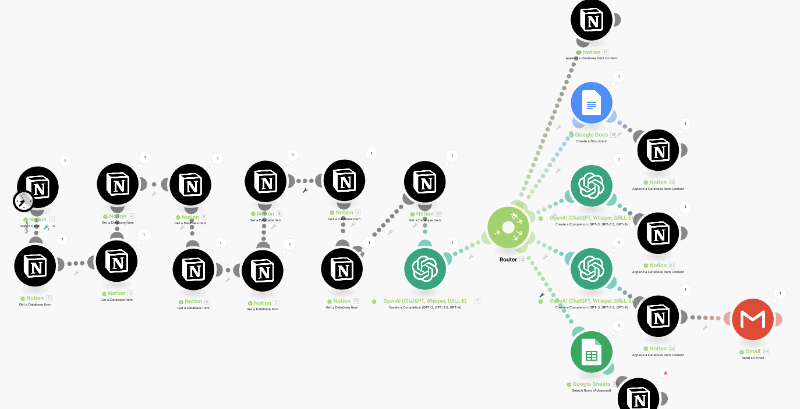
Closing Note
This completes the process of building your Recruiting AI Intern. Always ensure to test your workflow by filling up the Notion fields and running the Make Workflow, to verify everything is functioning as expected.
Most of the repetitive or time-consuming tasks can be solved using the best AI tools and improve recruiting efficiency. That's where ChatGPT comes in—a powerful AI language model that can supercharge your recruitment process.
If you're stuck anywhere in this process, you can refer to this Video Guide to follow the exact steps to build your AI-Intern without any errors or issues.